
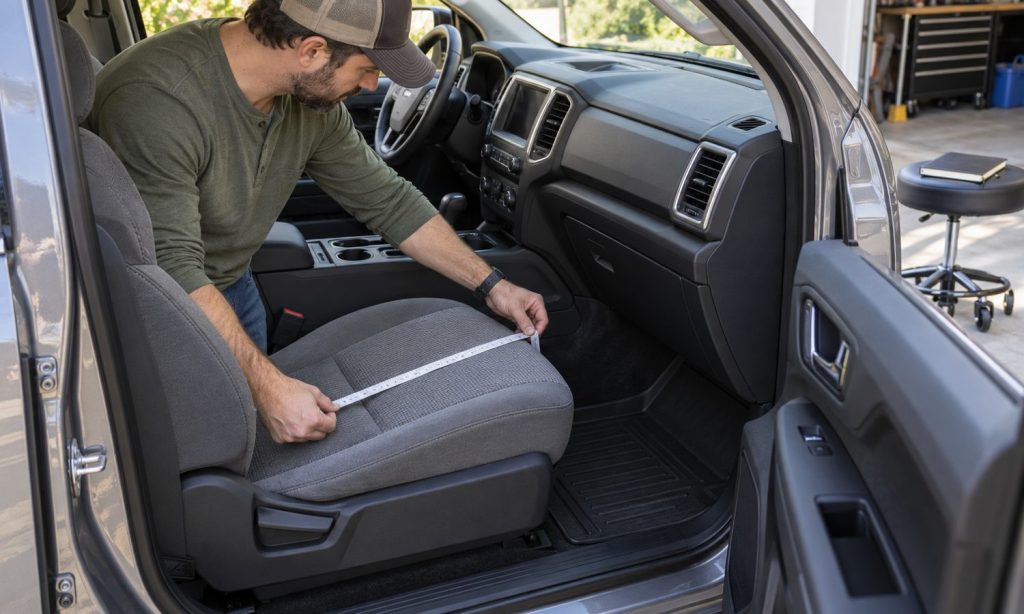
Learning how to measure Ford Ranger before ordering custom-fit interior accessories means recording more than seat width or floor length. The useful measurements depend on the accessory, its attachment method, and the exact cab and seat configuration. Start with the model year, cab style, trim, and installed options, then follow the accessory manufacturer’s measurement diagram. If you are assessing seat covers for your Ford Ranger, headrests, armrests, split sections, and restraint compatibility matter alongside dimensions. This guide explains how to make a repeatable measurement record for seats, consoles, floor protection, and interior storage. It does not supply one set of dimensions for every Ranger or treat a close numerical match as installation approval. The goal is to resolve fit questions before ordering and recognize uncertainties that require manufacturer confirmation.
Identify the configuration before using a tape
Record the model year, market, cab designation, and front and rear seating layout. Note whether the seats or console have been replaced. A VIN or trim description helps identify the original build, but it cannot establish what a previous owner changed. Photograph the actual interior rather than relying only on catalog images.
List the features the accessory must preserve: adjustable headrests, folding armrests, cupholders, seat controls, storage access, buckles, and any heated or ventilated seat functions. Record seat-mounted airbags and passenger-sensing equipment where fitted. Do not remove trim to search for components; consult the manual or a qualified technician when identification is uncertain.
For a custom-pattern product, confirm the listed application first. Your measurements should help validate the pattern or resolve a question, not persuade you to use a pattern intended for another cab. When the manufacturer’s guide does not show your layout, obtain confirmation before placing the order.
Use repeatable reference points
Gather a flexible tape for contours, a rigid rule for straight spans, a notebook, and a camera. Park securely and keep the vehicle switched off. Remove loose belongings and removable accessories that would distort the measurement, while leaving factory components in place.
Label each dimension with its starting point, ending point, unit, and measurement method. A straight-line width is different from a tape following a curved cushion. Record both only when requested, and identify them clearly. Do not mix inches and centimeters within a set without labeling the conversion.
Measure twice from the same reference points. If the results differ, check seat position, tape tension, and whether the tape follows the same path. Photograph the tape at each important location when practical. Do not add an allowance for stretch, padding, or clearance unless the maker’s instructions specifically require it.
Measure seats as separate components
For a seat-cover inquiry, record cushion width at the locations specified by the pattern guide, cushion depth, and backrest dimensions. Note the shape and height of bolsters rather than compressing them to obtain a smaller number. Keep the seat unloaded unless the measurement instructions say otherwise.
Record headrest shape, whether it is adjustable or integrated, and the dimensions requested for its cover. Photograph the post arrangement without dismantling it. Document armrest position, width, length, and movement. If the seat includes a folding center section, record that section separately from the adjacent seating surfaces.
For a rear bench, show the split layout and all folding or lifting sections. Include the locations of buckles, headrests, armrests, cupholders, and child-restraint access. An overall bench width can conceal important differences in these details. Do not assume two benches with similar widths use the same cover pattern.
A published Ranger owner discussion described acceptable main-cover fit alongside loose headrest pieces and interest in a cupholder opening. That is one owner’s experience, not a universal product finding. It illustrates why your record should include small components and access openings rather than only the largest surface.
Map console and storage clearances
For a console insert, measure the usable opening and the interior space at the depths the manufacturer specifies. Tapered walls, hinges, latches, and existing trays can reduce usable space. A compartment’s widest upper opening does not establish the size of an object that will sit at its bottom.
Record lid travel and access to USB ports, switches, cupholders, and removable trays. For a seat-gap or under-seat organizer, document the intended location and required seat movement. Never insert the tape into mechanisms or pull on wiring to create measuring space.
Check the accessory’s loaded dimensions if it expands or bulges. A soft organizer that fits empty may interfere with a lid or seat once filled. Use your normal cargo as the planning reference, but do not place a temporary mock-up where it could become trapped in a mechanism.
Treat floor protection as a pattern and retention check
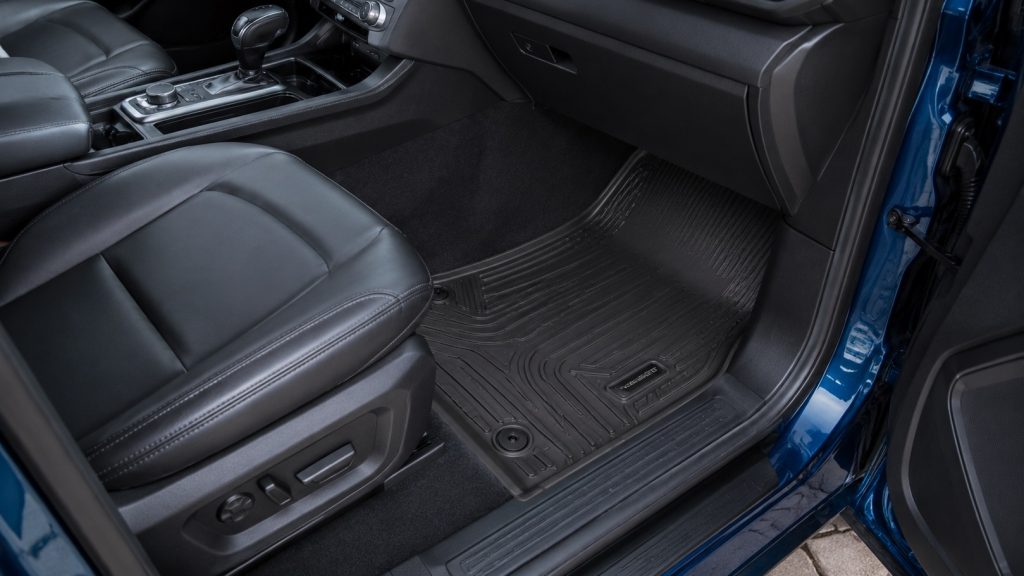
Measure floor areas only using the accessory maker’s template or diagram. Record contours, raised sections, and the number and position of factory retention points. Existing mats are not reliable templates if their fit is unknown or they have curled, shifted, or been trimmed.
Driver-side floor protection requires correct retention and unobstructed pedal movement. Do not stack mats, add makeshift fasteners, or cut around a pedal to force an unsuitable liner into place. Measurements help identify a mismatch; they do not replace a verified vehicle-specific application and installation check.
For rear floor coverage, note seat mounting areas, center contours, and any sections that must lift or fold. Check whether the accessory is one piece or several. Record how it will be removed for cleaning without pulling against wiring, trim, or seat hardware.
Verify movement and safety independently of size
An accessory must fit through the movements required in normal use. While parked, check the relevant seat positions, folding sections, doors, console lids, and storage access. Keep hands and measuring tools clear of moving parts. Record the smallest useful space rather than only the most generous position.
Airbag compatibility is a separate requirement. Ford warns that unsuitable accessory seat covers can interfere with deployment. Do not infer approval from a cover’s dimensions, a visible opening, or a broad airbag-compatible label. Confirm the exact seat and accessory against the vehicle manufacturer’s instructions before installation.
Similarly, dimensions do not establish child-seat compatibility or a storage item’s load capacity. Keep restraint routes and approved attachment points available. If the proposed installation requires changing a belt path, cutting a seam, drilling near safety equipment, or moving a sensor, stop and obtain qualified guidance.
Send a clear fit-verification package
Provide the accessory manufacturer with the exact product or pattern number, vehicle details, labeled photographs, and requested dimensions. Identify each unresolved point explicitly. Ask whether the selected package includes all the pieces shown for your configuration, including headrests or armrests where applicable.
Keep the written answer and ordering details. When the accessory arrives, compare its label, components, and instructions with that record before beginning installation. A different revision or variation should be checked again. Do not modify the vehicle or accessory merely because the return window is closing.
Related guidance: a parallel interior-accessory measurement guide for Ford Escape; Ranger seat-cover fitment details.
Frequently Asked Questions
Should I measure over the existing seat cover?
Usually the underlying seat configuration is what must be identified, but follow the maker’s directions. An added cover can change apparent dimensions and conceal seams or features. Remove only accessories designed for routine removal; do not dismantle factory upholstery or restraint components for measuring.
Can measurements replace the model-year fit guide?
No. Dimensions help explain a question, but mounting points, patterns, and safety equipment can differ despite similar sizes. Use the correct application guide and obtain confirmation when your actual configuration does not match it.
How much extra material should I allow?
Do not invent a universal allowance. Stretch, seams, foam, and attachment methods differ by design. Record the requested measurement accurately and let the manufacturer specify any allowance. Adding extra width yourself can produce a loose or incorrectly positioned accessory.
Is the passenger seat always identical to the driver’s seat?
No. Controls, sensing equipment, armrests, and adjustment arrangements may differ. Photograph and document each side separately. A matched-looking pair is not sufficient evidence that the same cover piece or organizer clearance applies to both.
What should I do when two measurements disagree?
Repeat the measurement using the same seat position and clearly marked endpoints. Check whether one follows a contour while the other spans it directly. If the manufacturer’s diagram remains ambiguous, send a photograph and ask which method it intends before ordering.
Final Words
Measure your Ford Ranger by exact configuration, labeled reference points, and the accessory manufacturer’s instructions. Include moving clearances and small components, then verify safety compatibility separately. Use the Ranger seat-cover application checks alongside your measurement record when planning upholstery protection. Accurate dimensions are useful evidence; a confirmed application and an unobstructed installation complete the fit decision.
Reference
2020 Ford Ranger Owner’s Manual: seats, restraints, and floor mats.
Ford Ranger owner guidance: side airbags and accessory seat covers.

Pingback: Ford Transit Connect Accessory Fitment Checks