Installing and routing wiring for a dash camera in a Dodge Ram 2500 depends on the truck’s model year, cab, factory equipment, and the camera’s power needs. A clean-looking cable path is not enough: the wire must stay clear of pedals, controls, moving trim, and airbag deployment areas. Start by checking the Ram owner’s manual and the camera maker’s mounting and power instructions. Decide whether an ignition-switched outlet meets your needs or whether a hardwire kit is necessary for a parking mode. Do not assume fuse locations or trim removal steps from a different Ram generation apply to your truck. This guide covers planning and verification at a general level; airbag-area routing and vehicle wiring should follow the exact Ram service information or be handled by a qualified installer.
Confirm the truck and camera configuration
Record the Ram’s model year, cab configuration, trim, and any relevant factory equipment before choosing a mount or wiring kit. A 2500’s cabin layout and electrical system can vary across generations. Check the camera’s input requirements, supplied power lead, storage needs, and whether it supports parking recording. Confirm that any hardwire kit is specified for the camera and has appropriate fuse protection and battery monitoring as directed by its manufacturer.
Decide how you expect the camera to operate. A connection to an outlet may power the camera only when the outlet is active, while a parking mode may continue drawing power after shutdown. Verify the Ram’s outlet behavior in the owner’s manual and by following the device instructions; do not assume that “12-volt outlet” always means ignition-switched. The article on dash-camera power options for parked-car recording outlines questions to consider before selecting a method.
Set a clear, unobstructed camera position
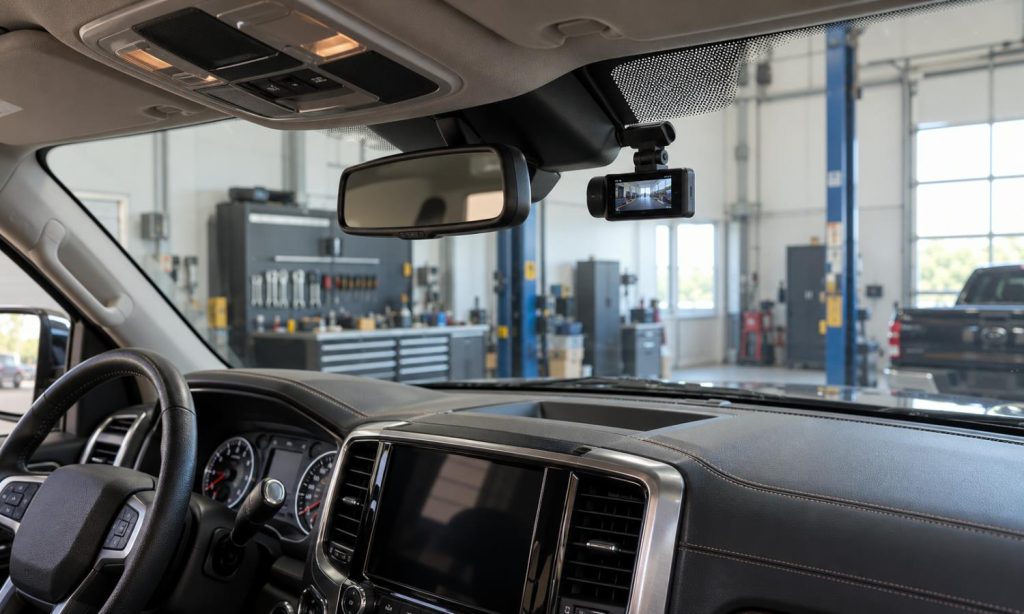
Sit in the normal driving position and check the camera location against the windshield, mirrors, displays, sensors, and the driver’s forward field of view. Follow the camera maker’s placement instructions and applicable state rules. A position near the rear-view mirror may keep the camera out of the central view, but the exact available space and vehicle equipment differ. Do not place a camera or mount in an airbag deployment path or where it could become a hazard to an occupant.
Clean the glass at the approved mounting point and attach the device according to its instructions. Confirm the camera angle before routing the power lead, then check from the driver’s seat that the image is not blocked by a mirror housing or tinted band. Visibility and mount placement in a Dodge Ram 2500 raises related cabin-layout questions, although a phone mount and dash camera have different requirements.
Plan a cable path without disturbing safety systems
Plan the route from the camera to the power connection before tucking wire. Keep cable away from the steering column, pedals, shifter, sharp edges, hot surfaces, seat tracks, and places where a door or glove box can pinch it. Secure slack so it cannot hang in the cabin, but leave enough movement for adjustments the camera instructions allow. Do not route across a belt, restraint component, or moving panel.
Take extra care around the A-pillar, headliner, and upper windshield trim because airbags and related wiring may be nearby. A plug-in outlet, hardwire kit, or mirror-area adapter can each have different power behavior and compatibility requirements. Check the exact device and Ram instructions rather than copying a route from a video, forum comment, or another vehicle. Do not pull an A-pillar cover, attach wire to a restraint, or push cable behind an airbag. If a safe route is not clear without disturbing trim, stop and consult model-specific service information or a qualified installer.
For comparison only, see our guides to dash-camera wiring in a Dodge Charger R/T and dash-camera wiring in a Ford F-150. Those vehicles have different cabin layouts and safety systems; neither page establishes a safe route or fitment for your Ram 2500.
Choose a power connection carefully
A compatible accessory outlet or USB source may be a simple choice if it meets the camera’s requirements and its on/off behavior suits your use. Route the cable without crossing controls or leaving a loop where it could catch. Confirm that the outlet is not needed for another device and that the camera does not remain on longer than intended.
Hardwiring adds work: the correct circuit, fuse rating, adapter, ground point, and kit instructions must all be verified for the exact truck. Do not wrap bare wire around a fuse, increase a fuse rating, or tap an unknown circuit. Avoid probing or disconnecting airbag wiring. The exact steps can vary with model year and electrical architecture, and a generic internet diagram may not match your 2500. If the manufacturer’s instructions do not clearly identify an approved method for your configuration, have a qualified automotive electrician handle the connection. For related accessory-visibility checks, see F-150 phone mount placement and visibility and dashboard device visibility in a Mustang Mach-E; both reinforce that the exact vehicle layout matters.
Test the installation before driving
With the truck parked, inspect the visible cable for loose sections, pinches, and contact with controls or moving parts. Check that the camera mount is secure and the lens does not obstruct the driver’s view, mirrors, or sensors. Connect the power source as described by the vehicle and camera makers. Start the truck and verify the camera records, responds to ignition changes as expected, and shuts down according to the selected power setup.
Watch for warning lights or electrical symptoms. If a restraint warning appears, stop using the installation and seek professional diagnosis; do not unplug safety-system components or try to clear the warning. Recheck the mount angle and cable security after a brief drive. If the camera is a dual-channel system, inspect the rear cable route separately and avoid disturbing side-curtain airbags or rear trim without the correct instructions. If you plan to leave the camera powered while parked, review our guide to accessory-related battery drain on a Dodge Ram 2500 and the general dash-camera power options for parked-car recording. A phone mount is a different device, but our Ram 2500 visibility and mount-placement guide covers the same cabin-layout concern.
Frequently Asked Questions
Can I route dash-camera wiring behind the Ram 2500 A-pillar?
Do not assume that is safe. Airbags or related wiring may be near the pillar. Use only a verified procedure for the exact model year or ask a qualified installer.
Is a plug-in power source enough for a dash camera?
It may be, if the camera supports it and the outlet’s power behavior meets your needs. Check whether the camera will shut off with the truck or remain powered.
Can I use a mirror power adapter instead of hardwiring?
Only if the adapter is designed for the specific mirror connector and camera, and the vehicle’s equipment supports it. Verify compatibility with the adapter maker and Ram service information.
Will a dash camera drain the Ram 2500 battery?
Any device that continues drawing power while parked can affect the battery. Follow the camera maker’s power-management instructions and confirm the truck’s outlet or hardwire behavior.
What should I do if a warning lamp appears after installation?
Stop and arrange professional diagnosis. Do not clear the warning or disturb restraint-system connectors yourself.
Final Words
A dash camera in a Dodge Ram 2500 should be mounted where it preserves visibility and wired with a route that stays clear of pedals, controls, moving trim, and airbag deployment paths. Confirm the exact truck configuration, the power source’s behavior, and the camera maker’s requirements before installation. Owner reports can suggest useful questions, but they cannot verify a safe route on your specific truck. If installation requires removing safety-related trim or tapping a circuit you cannot identify from authoritative instructions, stop and use a qualified installer.