
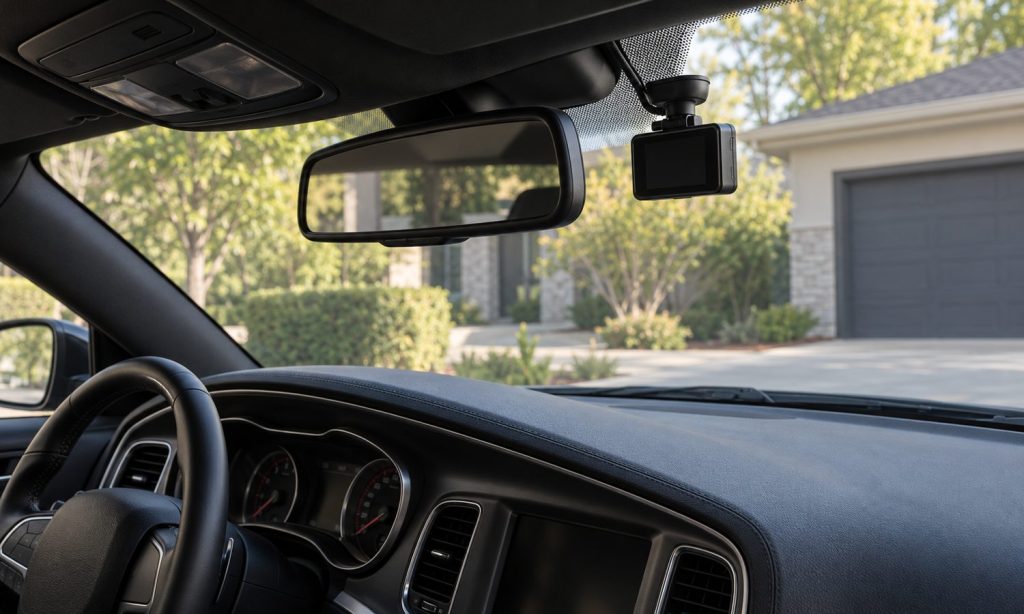
Installing and routing wiring for a dash camera in a Dodge Charger R/T starts with a plan for camera position, power, and a cable path that stays clear of safety equipment. The R/T badge does not identify one fuse layout or interior arrangement across every model year. Check the Charger’s owner’s manual, the camera instructions, and any power-kit documentation before removing trim or connecting wires. A plug-in installation can still create hazards if a cable hangs near pedals or crosses an airbag path. Hardwiring adds circuit-selection and battery-protection questions that may require a qualified installer. This guide explains the planning and verification steps without inventing a universal fuse number, wire color, or pillar-trim procedure. Complete the setup while parked, then confirm actual recording and shutdown behavior before relying on the camera.
Identify the camera, power kit, and vehicle
Record the Charger’s year and equipment, the camera model, and the exact power cable or hardwire kit. Verify the camera’s required input and whether the supplied adapter converts the vehicle supply to that input. A connector that physically fits does not prove correct voltage, current capability, or parking-mode support.
Decide whether you need recording only while driving or also while parked. These goals can require different power arrangements. Review the camera’s supported memory card, operating temperature, mounting method, and setup requirements before installation. Bench setup according to its instructions can resolve basic configuration problems before a cable is concealed.
Choose a camera position without blocking the driver
Evaluate the complete camera and mount from the driver’s normal seating position. Keep the road view, mirror operation, vehicle sensors, and essential controls unobstructed. Check the lens view on the camera rather than assuming a central position captures the road well. Windshield tint, frit patterns, reflections, and wiper coverage may affect the usable view.
Confirm applicable windshield-placement rules where the car will be driven. Follow the mount’s surface preparation and curing instructions, and allow clearance for connectors and memory-card access. Do not attach the camera to safety-system covers or modify the mirror housing without documented compatibility. Recheck the driver’s view with the screen and any status lights operating.
Choose power by verified behavior
For a plug-in setup, verify the selected outlet’s rating and whether it stays powered after shutdown. The 2016 Charger manual describes more than one accessory outlet, illustrating why the actual outlet and vehicle instructions matter. Do not assume all sockets behave identically or that a USB data port supplies the camera’s required power.
For parked recording, verify how the camera detects ignition-off and what power remains available. A compatible hardwire kit may use constant power, a switched signal, and ground; another system may work differently. The existing guide to dash-camera power for parked recording explains those distinctions and their battery implications.
Plan the full route before concealing the cable
Lay out the route conceptually from the camera to the power source and identify every area that needs clearance. The cable must not interfere with steering, pedals, shifters, seat tracks, door operation, or occupants. Allow the connector enough slack for adjustment without leaving dangling loops. Protect the cable from sharp edges and pinch points.
The upper windshield, roof lining, and pillars may be near airbag equipment. Do not push cable blindly under trim, fasten it to an airbag, or place it across a deployment path. “Hidden behind trim” is not a safety assessment. Use the model-specific service information and have a qualified installer handle routing where the safety-system layout or trim-release procedure is uncertain.
Treat hardwiring as an electrical installation
Do not select a fuse cavity from a video of a different Charger. The installer needs the correct circuit information and must verify the supply behavior required by the camera kit. An apparently unused position is not automatically an approved accessory source. Safety-critical circuits should not be repurposed to power a camera.
Fuse protection, tap compatibility and orientation, grounding, cable rating, and secure connections all matter. Do not increase an existing fuse rating to stop a new fault or wrap bare wire around a fuse blade. Follow the vehicle’s electrical precautions and the kit’s instructions. Stop if instructions conflict, the circuit cannot be identified, or safe access would require disturbing an airbag system without the proper procedure.
Plan rear-camera wiring separately
A rear camera adds another route, connector, and mounting position. Verify that its cable is the supported type and long enough without tension. Keep it clear of seat folding, belt hardware, airbags, and moving trim. Do not assume a front-camera cable and rear-camera cable are interchangeable because their plugs look similar.
At the rear glass, consider defroster elements, tint, visibility, and the camera’s mounting instructions. Avoid scraping or damaging window features while preparing the surface. Keep the lens view clear and confirm that the camera points in the intended direction. Do not drill or route into the trunk simply because a nearby opening looks convenient.
Test the finished installation while parked
Confirm that recording starts correctly, the time and date are set, and both camera views are usable if fitted. Review saved clips rather than relying only on an illuminated indicator. Verify normal shutdown or transition to parking mode, then restart the car and confirm that driving recording resumes. Keep the vehicle stationary during configuration.
If parked recording is enabled, verify the supported cutoff or timer settings and monitor starting behavior. A cutoff cannot guarantee that an old or undercharged battery will start the car. Inspect the route again after normal use for loose clips, connector strain, or rubbing. For hot wiring, blown fuses, new warning lights, or repeated low-battery symptoms, stop using the installation and have it checked.
Related guidance: dash-camera wiring and routing considerations in a Ford Fusion; dash-camera power options for parked recording.
Frequently Asked Questions
Can I power the camera directly from any 12-volt wire?
No. The camera may require regulated power and specific ignition signaling. Use a documented compatible adapter or kit and a verified source with correct circuit protection. A random wire is not an acceptable connection plan.
Is an OBD2 power adapter automatically compatible?
No. Confirm support for the camera and vehicle, power protection, and physical clearance. It also occupies the diagnostic port. Do not add an unsupported splitter to solve that conflict.
Can I leave extra cable loose under the driver’s seat?
No. Seat movement and nearby mechanisms can trap or damage it. Secure excess cable in an approved location away from moving parts, heat, and occupant space, following the installation instructions.
Will parking mode record indefinitely?
No. Runtime depends on the power arrangement, camera settings, battery condition, temperature, and cutoff behavior. Do not promise a duration based on another vehicle or a different recording mode.
What should I document for later service?
Keep the camera and kit models, power-source details, fuse information supplied by the installer, route notes, and settings. Tell future technicians about the installation before electrical diagnosis or interior-trim work.
Final Words
A Charger R/T dash-camera installation needs a clear view, compatible power, protected wiring, and a route that preserves safety-system operation. Use exact vehicle and kit instructions, get qualified help for uncertain wiring, and test saved recordings and shutdown behavior. Recheck the system when the camera, cable, or vehicle configuration changes.
Reference
2016 Dodge Charger Owner’s Manual — equipment and outlet information; verify your model year. NHTSA: airbag safety.
Pingback: Dodge Ram 2500 Dash Cam Wiring and Routing