Installing and routing wiring for a dash camera in a Ford F-150 starts with choosing a mounting position and power method that suit the truck’s model year and equipment. F-150 interiors, fuse panels, headliner details, and restraint systems vary, so a generic installation video is not a vehicle-specific procedure. Keep the camera and cable clear of the driver’s view, pedals, controls, and airbag deployment paths. A simple plug-in power connection may avoid altering vehicle wiring; a hardwire kit adds steps that require the correct fuse circuit and vehicle-specific instructions. Do not remove trim or work around an airbag unless the Ford service information or a qualified installer provides the correct procedure. This guide explains planning and checks, not a substitute for the exact owner’s manual, camera instructions, or professional electrical work.
Confirm the camera and power setup
Check the dash camera’s input voltage, supplied cable, plug type, and any parking-recording feature before installation. Some systems use a 12-volt outlet or USB power; others need a hardwire kit with its own fuse protection and battery-voltage control. Confirm that the kit is approved for the camera and suitable for the truck’s electrical system. Do not assume a connector, fuse position, or accessory circuit is the same across F-150 model years or trims.
Decide whether you need recording only while driving or also while parked. A parking mode may draw power after the ignition is off, so check how the device shuts down or protects the vehicle battery. A general overview of dash-camera power options for parked-car recording can help you compare the questions to ask about that feature. Do not treat a cutoff setting as proof that any particular setup is safe for every F-150 battery or use pattern.
Choose a legal, unobstructed camera position
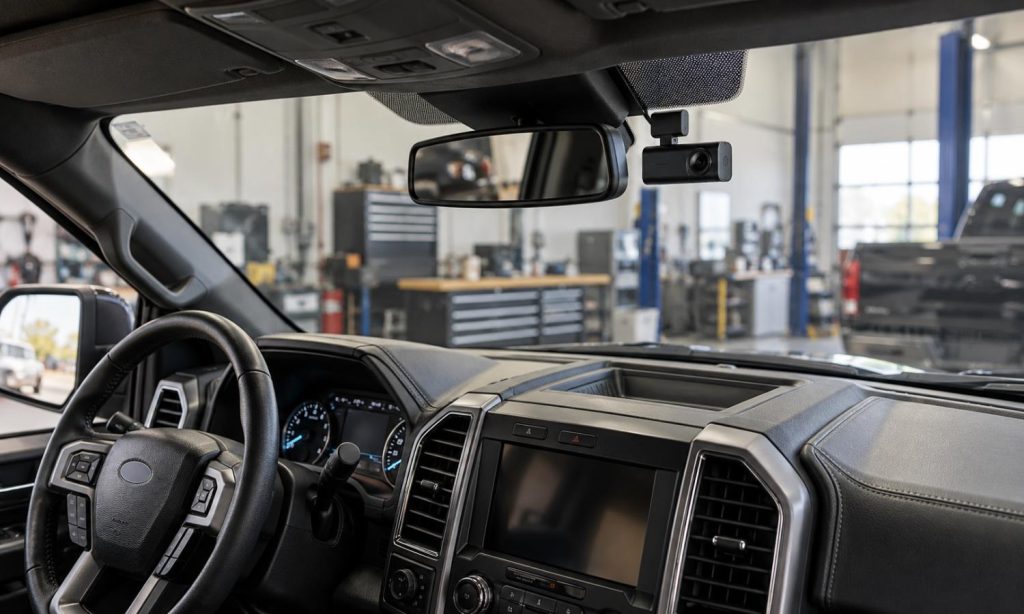
Sit in the driver’s seat and identify a position that captures the road without blocking your view through the windshield, mirrors, displays, or driver-assistance sensors. Follow the camera maker’s mounting limits and applicable state rules for windshield-mounted devices. A position near the rear-view mirror may be convenient, but check the truck’s equipment and sightlines rather than copying another owner’s placement. The lens should remain clear of the wiper-swept area only as directed by the camera instructions; do not place a mount where it can interfere with an airbag.
Clean and dry the selected mounting area, attach the camera using its supplied mount, and verify that the view is level before tucking any cable. Avoid placing the device or its mount where it can strike an occupant or obstruct airbag deployment. A useful related guide is F-150 phone-mount placement and driver visibility; a dash camera has different requirements, but the same general need to preserve sightlines applies.
Plan the cable route before tucking wire
With the truck parked, map a route from the camera toward the chosen power source. Keep the cable away from the driver’s legs, pedals, steering column, sharp trim edges, hot surfaces, moving seat tracks, and places where a door or glove box can pinch it. Leave enough slack for normal movement of a visor or adjustable camera mount, but secure excess cable so it cannot hang into the cabin.
Be especially cautious around A-pillar trim and the headliner because side-curtain airbags may be located there. Do not place a cable over an airbag, tie it to a restraint, or remove the A-pillar cover based on a video or forum post. Airbag and wiring locations can vary by model year and equipment. If a safe path is not visible without disturbing trim, stop and consult model-specific Ford service information or a qualified installer.
For comparison only, see our guides to dash-camera wiring in a Dodge Charger R/T and dash-camera wiring in a Dodge Ram 2500. Their cabins and restraint systems differ, so neither article establishes an F-150 cable path.
Use a plug-in source or seek help with hardwiring
A compatible 12-volt outlet or USB port can be the least invasive power choice if it meets the camera’s requirements and does not leave a cable across controls. Check whether the outlet turns off with the ignition and whether the camera maker allows that power source. Route the cord so it cannot obstruct steering, shifting, pedals, or passenger movement.
Hardwiring involves identifying the correct circuit, using the specified fuse adapter and fuse rating, grounding only at an approved point, and protecting the wiring. Those details depend on the exact F-150 year and electrical configuration. Never wrap a bare wire around a fuse, substitute a larger fuse, or tap a circuit because a forum post says it worked. Do not probe airbag wiring or disconnect restraint-system connectors. If you cannot verify the circuit and installation method from authoritative vehicle-specific instructions, have a qualified automotive electrician install it. Our guide to universal versus vehicle-specific F-150 accessories explains why the truck’s exact configuration matters; it does not supply a wiring diagram.
Check the installation before driving
Before turning the camera on, inspect the entire visible cable path. Confirm that the wire is secure, does not cross a pedal or airbag area, and cannot be pinched by a door, visor, or trim panel. Check that the camera stays attached and does not obstruct a mirror, sensor, or the driver’s forward view. Connect power only as directed by the camera and vehicle instructions.
Start the truck and confirm the camera powers on, records, and shuts down as expected when the ignition state changes. Check for any new warning lights or electrical symptoms. If an airbag or restraint warning appears, stop using the installation and seek professional diagnosis; do not attempt to clear it by unplugging components. Recheck the camera angle and cable security after a short drive. For general fitment questions, see the checklist for installing accessories in a Ford Transit Connect. It is not an F-150 procedure, but it highlights the need to check controls, wiring, and clearance on the exact vehicle. For a power-method comparison, see dash-camera power options in a Ford Transit Custom; verify the F-150 outlet and battery behavior independently.
Common mistakes to avoid
- Assuming a cable route or fuse location from another model year applies to your truck.
- Routing a wire across an airbag or fastening it to restraint-system hardware.
- Using an unprotected bare-wire fuse tap or a fuse with the wrong rating.
- Leaving cable slack near pedals, steering parts, or a moving seat.
- Mounting the camera where it blocks the driver’s view, a mirror, or a sensor.
- Ignoring a new warning lamp after installation.
Frequently Asked Questions
Can I hide a dash-camera wire behind the F-150 A-pillar trim?
Do not assume that tucking a wire behind the trim is safe. Side-curtain airbags may deploy near the pillar. Use only a verified vehicle-specific routing procedure or ask a qualified installer.
Is a 12-volt outlet better than hardwiring?
It can be a simpler option when the camera supports it and the outlet’s ignition behavior meets your needs. Hardwiring may support parking features but requires correct circuit selection and installation.
Can a dash camera record while the truck is parked?
Some cameras support parking recording, but the power method and battery-protection behavior vary. Check the camera instructions and have the wiring verified for the exact truck.
Where should I mount the camera?
Choose a position allowed by local rules and the camera maker that preserves the driver’s view, mirrors, sensors, and airbag deployment zones. Check from the seated driving position before securing it.
What if an airbag warning appears after installation?
Stop and arrange professional diagnosis. Do not disconnect restraint-system components or try to clear the warning yourself.
Final Words
A safe dash-camera installation in a Ford F-150 depends on the exact truck configuration, device instructions, clear visibility, and a cable route that stays away from pedals, moving parts, and airbag deployment paths. A plug-in power source may avoid some wiring changes, while hardwiring calls for vehicle-specific circuit information and careful work. Do not copy an internet route or disturb A-pillar trim without verified instructions. If you cannot confirm the route or electrical connection, use a qualified installer. Follow the camera and vehicle instructions, and preserve the truck’s original safety systems.